 Prana Bloom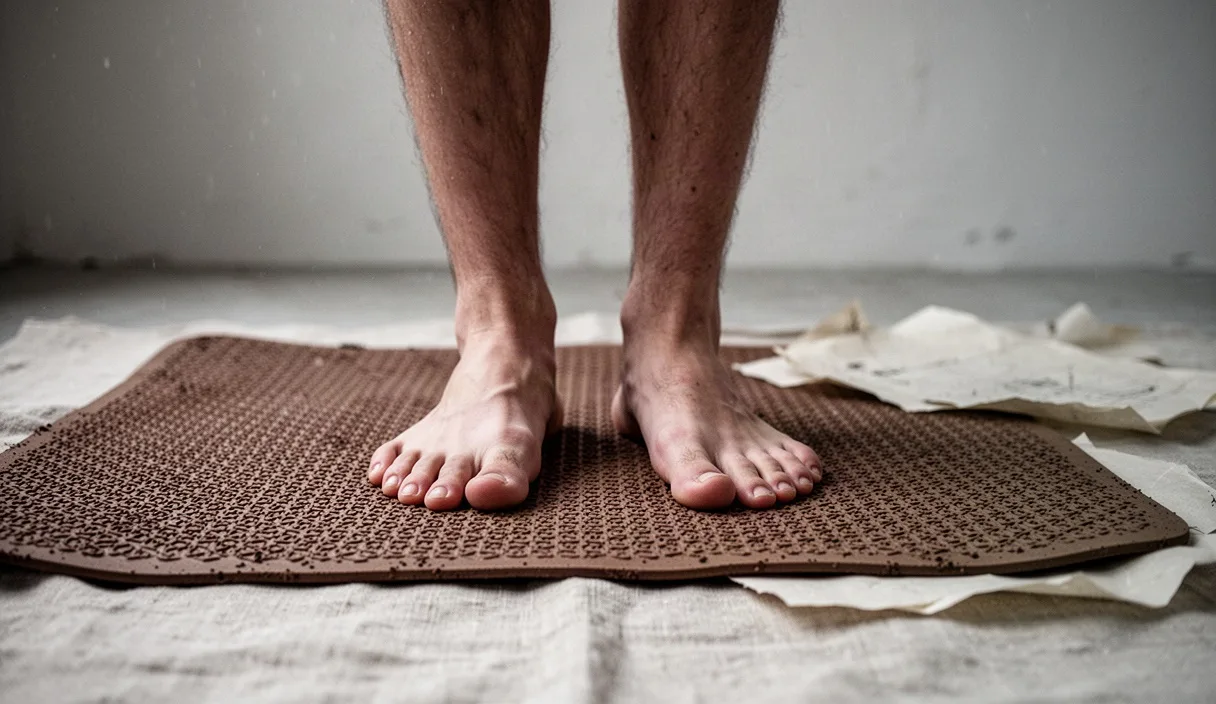

Mountain pose, known as Tadasana in Sanskrit, forms the structural foundation for standing yoga postures. The posture appears static when seen from the outside. The practitioner stands upright on two feet with the arms resting at the sides. Beneath the surface stillness, the nervous system and skeletal muscles make continuous micro-adjustments against the downward pull of gravity.
This posture teaches neutral physical alignment. The exercise shows you where your body holds habitual patterns of weight distribution. You observe how your joints stack above the earth. A stable base removes excess tension from the secondary stabilizing muscles. The breath slows down as the skeleton carries the weight of the body.
Four balance points in the soles
The foundation of the posture begins under the feet. Stand with your feet parallel to each other. Place the inner edges of the feet two to four inches apart. Look down at your feet to confirm that the second toes point straight forward. Weight often drifts toward the outer edges of the feet or falls inward toward the arches.
Distribute your weight evenly across four anatomical points on the bottom of each foot. Point one lies beneath the ball of the big toe. Point two sits beneath the ball of the little toe. Point three rests at the inner corner of the heel. Point four rests at the outer corner of the heel. These four points form a stable rectangle on the mat.
| Balance Point | Anatomical Location | Physical Action |
|---|---|---|
| First Point | Base of the first metatarsal head | Press down to anchor the inner foot arch. |
| Second Point | Base of the fifth metatarsal head | Ground down to stabilize the lateral border. |
| Third Point | Medial calcaneal tuberosity | Bear weight to support the inner ankle. |
| Fourth Point | Lateral calcaneal tuberosity | Bear weight to prevent inward ankle collapse. |
Lift all ten toes off the rubber mat. Spread the toes apart by several millimeters to create space between the joints. Set the toes back down one by one, moving from the little toes toward the big toes. Feel the three natural arches of the foot respond to this action. The medial longitudinal arch lifts away from the floor. The lateral arch stabilizes. The transverse arch across the ball of the foot expands.
Shift your body weight forward toward the toes by half an inch. Notice the tension that enters the calves and shins. Shift your weight backward onto the heels. Notice how the hip flexors tighten to keep you upright. Rock from left to right across the side rims of the feet. Return to the center. Settle your mass directly over the middle of the foot arches where all four points carry balanced weight.
Knee joint softness and thigh engagement
The knee joints sit directly above the ankles. Many people hyperextend their knees when standing still. Hyperextension pushes the tibia and femur backward against the posterior capsule of the knee joint. This bone-on-bone lock compresses the meniscus and slackens the surrounding muscular support.
Release the joint lock by introducing an invisible micro-bend into both knees. The bend measures less than three degrees of flexion. It does not look like a squat. To an external viewer, your legs appear completely straight. This minor flexion transfers the body weight from the inert connective ligaments into the muscular tissue of the lower extremities.
- Unlocking the joint: Soften the back of the knee caps to relieve pressure on the cruciate ligaments.
- Contracting the quadriceps: Draw the front thigh muscles upward toward the hip bones to steady the kneecaps.
- Spiraling the thighs: Rotate the upper inner thighs subtly backward toward the space behind you.
- Stiffening the outer hips: Hug the outer hips toward the midline to counter the internal rotation.
The upward lift of the patella must be active without creating tension in the hip sockets. As the quadriceps contract, the hamstrings at the back of the thighs lengthen downward toward the calf heads. This dual action creates a muscular sheath around the femur bones. If you experience sharp joint discomfort during this action, stop the engagement and consult a physical therapist for an evaluation of your knee mechanics.
Neutral pelvis alignment cues
The pelvis functions as the physical center of gravity for the entire torso. It rests on the heads of the two femur bones. Most standing habits involve an anterior tilt or a posterior tilt of this structure. An anterior tilt spills the pelvis forward, which compresses the five lumbar vertebrae. A posterior tilt tucks the tailbone too deep, which flattens the natural lumbar arch and strains the sacroiliac joints.
A neutral pelvis balances between these two mechanical extremes. The anterior superior iliac spines, which are the two bony points on the front of your hips, must align on the same vertical plane as the pubic bone. You can verify this alignment with your hands. Place the heels of your palms on your hip points and rest your index fingers on your pubic bone. The triangle formed by your hands should sit perpendicular to the floor.
| Pelvic Position | Spinal Effect | Muscular State |
|---|---|---|
| Anterior Tilt | Excessive lumbar lordosis | Tight hip flexors, weak lower abdominals. |
| Posterior Tilt | Flattened lumbar curve | Tight hamstrings, inactive active vitality spinae. |
| Neutral Pelvis | Natural spinal curves preserved | Balanced abdominal and lumbar support. |
Lengthen your tailbone toward the space between your heels. Do not tuck the tailbone under with force. Simply guide the coccyx downward with your awareness. As the tailbone descends, draw the lower abdomen inward and upward by two centimeters. This contraction activates the transversus abdominis muscle. The deep abdominal layer acts like an internal corset that stabilizes the lumbar spine without restricting your diaphragmatic breathing.
Shoulder blade settling and collarbone width
Daily activities like typing, driving, and reading pull the shoulder girdle forward. The pectoralis minor muscles shorten over time, while the rhomboids and middle trapezius muscles become stretched and weak. Mountain pose systematically returns the shoulder blades to their home position on the posterior rib cage.
Inhale and draw the shoulders upward toward the ears by two inches. Roll the shoulder joints backward in a smooth semi-circle. Exhale and slide the scapulae down the back toward the rear waistline. Imagine the shoulder blades are flat weights slipping into the back pockets of a pair of trousers. This action drops the upper trapezius away from the base of the neck.
- Widening the collarbones: Expand the chest horizontally from the sternum outward to the tip of each shoulder.
- Softening the front ribs: Keep the lower two front ribs drawn in toward the spine so the chest does not jut forward.
- Extending the arms: Let the arms hang naturally alongside the body, three inches away from the hips.
- Releasing the fingers: Straighten the fingers gently, pointing the tips toward the floor with the palms turned slightly forward.
Do not pinch the shoulder blades together with maximum effort. Pinching the scapulae pushes the lower rib cage forward and arches the mid-back. Keep the front of the body as broad as the back of the body. The collarbones remain wide, flat, and level. The muscles across the upper back stay relaxed while maintaining clear spatial tone.
Crown lifting and steady gaze point
The human head weighs between ten and twelve pounds in an adult. When the head drifts forward by two inches, the effective load on the cervical spine increases significantly. In Mountain pose, the skull balances directly on top of the first cervical vertebra, known as the atlas.
Draw the chin back horizontally by one centimeter to correct forward head posture. This motion is a subtle retraction, not a downward flexion. The earlobes must sit directly above the central point of the shoulders. The back of the neck lengthens upward, creating space between the occipital bone and the cervical spine.
Reach the crown of the head toward the ceiling. Visualize a plumb line extending from the center of the earth, passing through your pelvic floor, running through the center of your vertebrae, and exiting the top of your skull. The spine elongates along this vertical axis. The facial muscles, jaw, and tongue remain soft and uncontracted.
Direct your eyes toward an unmoving object in front of you. This practice of visual focus is called a drishti. Choose a fixed point at eye level, roughly five to eight feet away. If you stand near a wall, find a small mark on the surface. Rest your gaze on this mark with a soft, steady focus. Avoid blinking rapidly or scanning the room. A steady gaze settles the balance organs inside the inner ear and reduces postural sway.
Common mistakes
The most frequent error in Mountain pose is hyperextension of the knee joints. Practitioners often push their knees back until the joint reaches its anatomical end range. This habit disables the quadriceps and shifts all vertical load onto the posterior cruciate ligament. Maintain the micro-bend at all times to keep the legs actively working.
Another common mistake occurs in the lower ribs. When asked to open the chest, practitioners routinely thrust the bottom ribs forward. This movement mimics thoracic mobility by bending the lumbar spine. Keep the front lower ribs integrated with the abdominal wall while spreading the collarbones wide.
Foot pronation happens when the medial arches collapse toward the floor. This collapse causes the shins to rotate inward, which misaligns the knee joints and drops the pelvis out of neutral. Press down through the base of the big toe and the outer heel simultaneously to preserve the upward lift of the arch.
Practical next steps
Test your Mountain pose alignment against an interior wall. Stand with your heels two inches away from the baseboard. Your sacrum, your upper thoracic spine, and the back of your head should touch the flat drywall surface. Check the space behind your lower back. Your hand should slide into the lumbar curve with minimal clearance. If your entire forearm fits behind your back, your pelvis is tilted too far forward. If your hand cannot enter at all, your lower back is flat.
Practice Mountain pose for three continuous minutes every morning. Set a timer on your phone. Close your eyes for thirty seconds during the hold to challenge your balance mechanisms. When the eyes close, the brain must rely on sensory feedback from the soles of the feet and the joint receptors. If you have chronic vestibular problems, keep your eyes open and practice near a sturdy chair for support. Move from this grounded alignment directly into your daily walking and standing routines.